설명
In 2.0 the new Jobbnorge API is used, and the following features are available ( ~~strikethrough~~ means removed, since it’s not in the new API):
- Sort jobs bye deadline, closest first.
- Does not show jobs that are past the deadline.
- Set the number of jobs to display.
- ~~Set the number of words in the excerpt.~~
- Set the no jobs message.
- Show or hide the job excerpt.
- Show or hide the job deadline.
- Show or hide the job scope.
- ~~Show or hide the job duration.~~
- Display the jobs in a grid or list view.
- Set the number of columns in the grid view.
New features in 2.0:
– Add more than one employer.
– If more than one employer is added, order jobs by employer or deadline.
– Define which employers are available in the block, using the jobbnorge_employers filter.
Filters
jobbnorge_employers
The jobbnorge_employers filter can be used to define which employers are available in the block:
add_filter( 'jobbnorge_employers', function( $employers ) {
    $employers = [
        [
            'label'    => 'Select employer',
            'value'    => '',
            'disabled' => true, // Optional.
        ],
        [
            'label' => 'Employer 1',
            'value' => '1234',
        ],
        [
            'label' => 'Employer 2',
            'value' => '5678',
        ],
    ];
    return $employers;
} );
jobbnorge_cache_path
The jobbnorge_cache_path filter can be used to define the cache path. Default is WP_CONTENT_DIR . '/cache/jobbnorge'.
jobbnorge_cache_time
The jobbnorge_cache_time filter can be used to define the cache time. Default is 30 * MINUTE_IN_SECONDS.
GitHub
The plugin is also available on GitHub
스크린샷

Install the block from the Block Directory. 
Add employer ID. 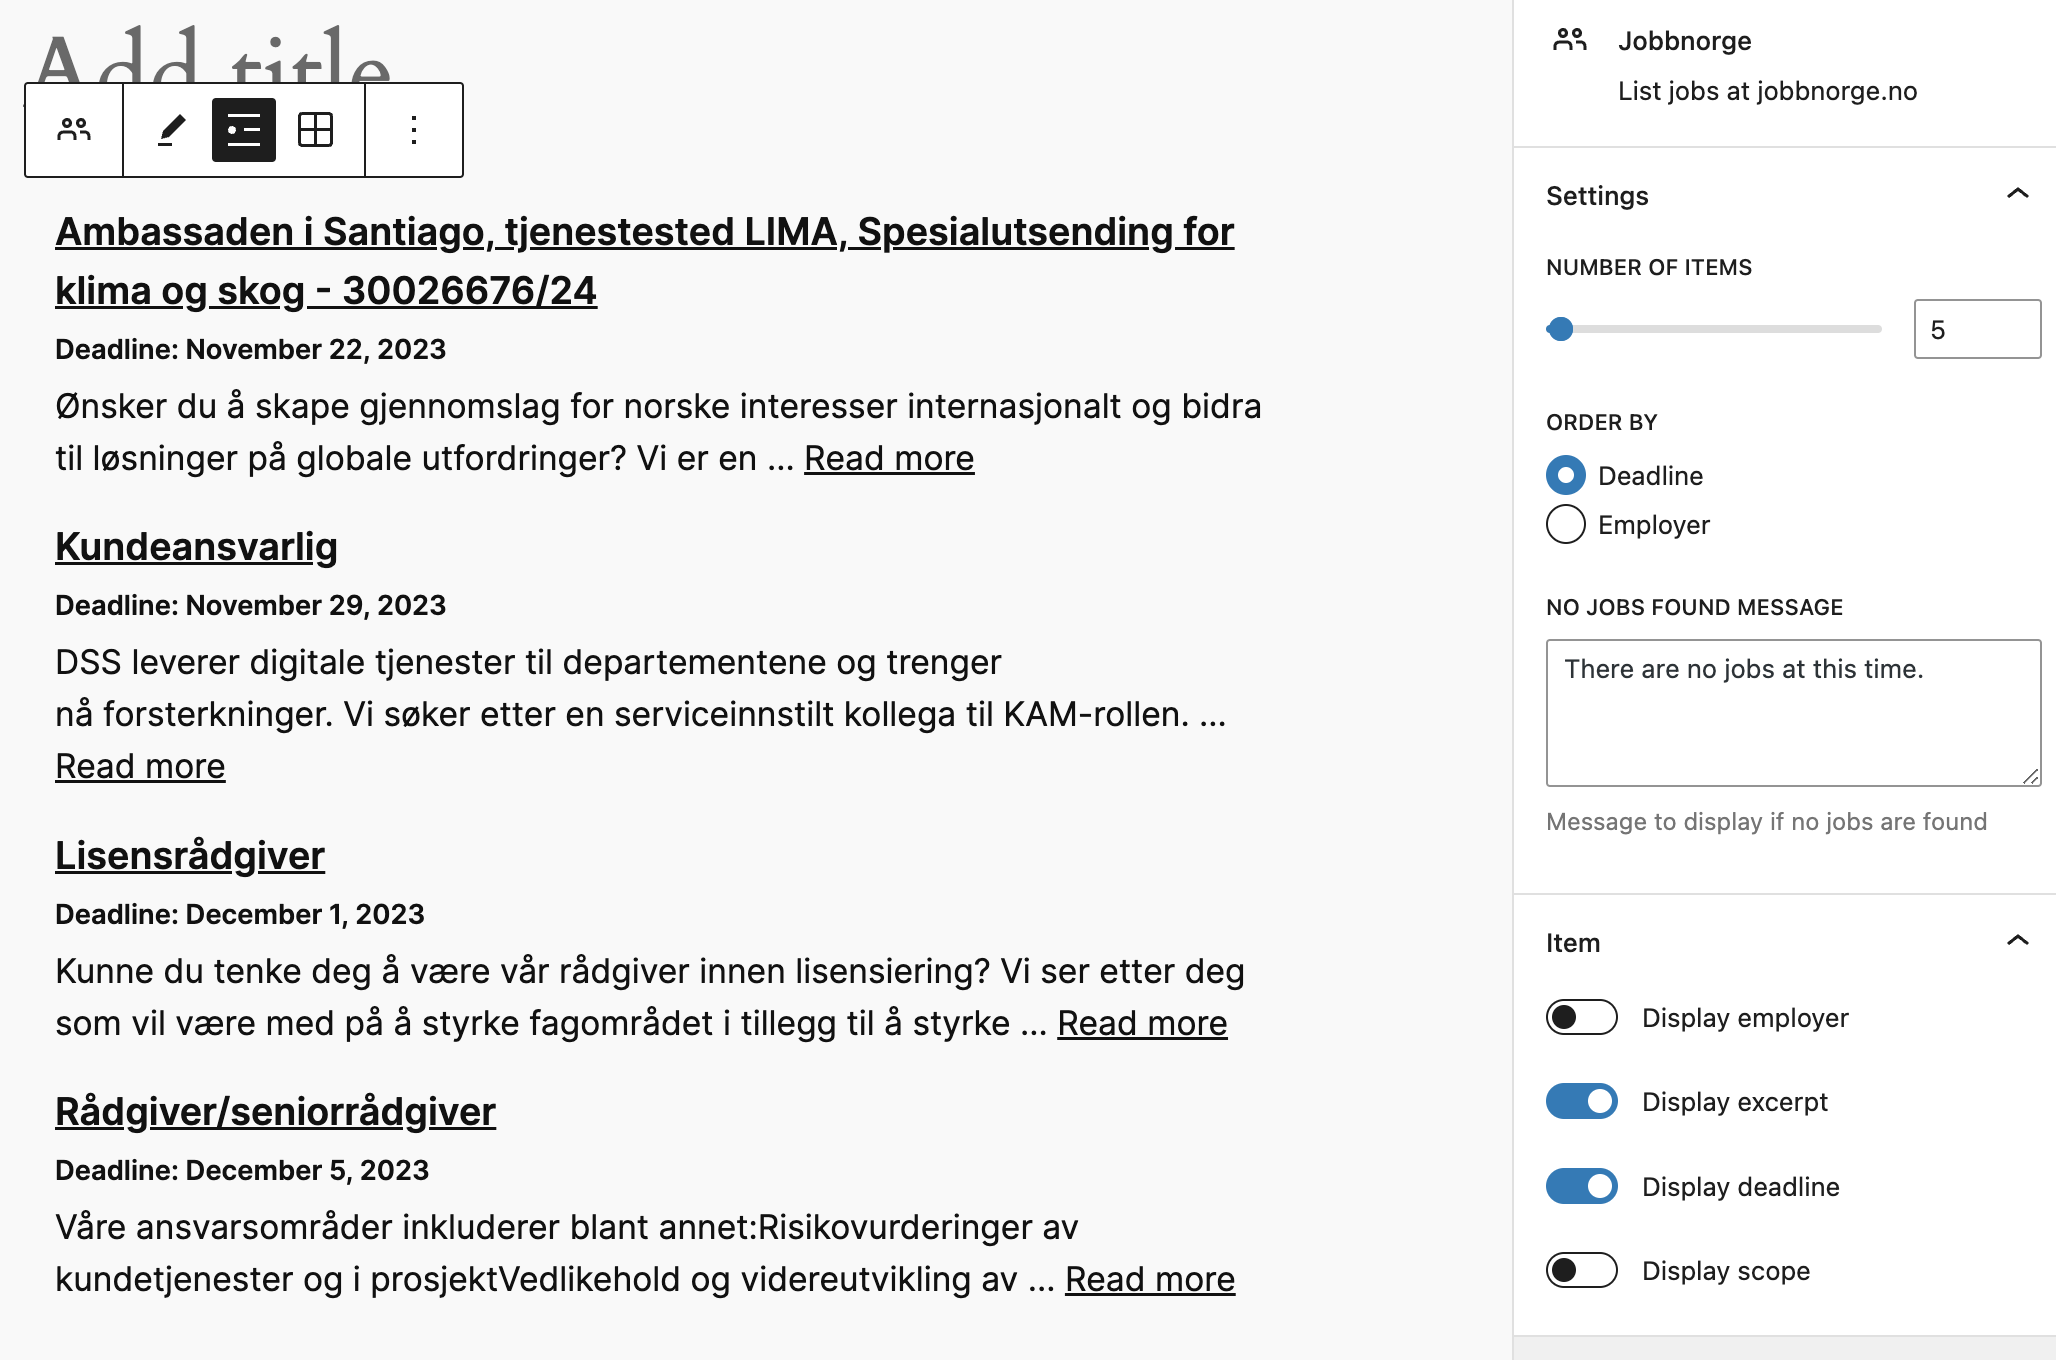
Listview with options. 
Gridview with options. 
Custom Select field for employer ID. Ctrl-click (Windows) or Cmd-click (Mac) to select multiple employers. Shift-click to select a range of employers.
블록
이 플러그인은 1(을)를 제공합니다.
- Jobbnorge Retrieve and display job listings from Jobbnorge.no
설치
Either, add the block from the Block Directory:
- To add a block from the Block Directory, navigate to the post editor.
- Place your cursor where you would like a new block option.
- Select the “Add Block” button in the top-left area of the editor screen.
- Search for “Jobbnorge” and select the “Jobbnorge” block.
Or, add the block from the WordPress admin:
- In the WordPress admin, go to the “Plugins” screen, click “Add New” and search for “Jobbnorge”.
- Click “Install Now” and then “Activate Plugin”.
- Use the Gutenberg editor to add the block to a page or post.
FAQ
-
Where to I find the employer ID?
-
You get it from your Jobbnorge contact.
후기
이 플러그인에 대한 평가가 없습니다.
기여자 & 개발자
변경이력
2.1.5
- Add uninstall handler. Will remove the cache directory when the plugin is uninstalled.
2.1.4
- Update translation.
2.1.3
- Bump version.
2.1.2
- Update translation.
2.1.1
- Update translation.
2.1.0
- Use local cache. The local cache is a simple caching mechanism that stores data in PHP files. In theory, nothing is faster in PHP than loading and executing another PHP file. If you have PHP OPcache enabled, then the PHP content will be cached in memory, and the PHP file will not be parsed again.
- Add filter for cache path and cache time.
2.0.0
- BREAKING CHANGE, using the Public Jobbnorge API and you need to add the employer ID.
1.0.12
- Tested with WordPress 6.3
- Deadline format fix.
1.0.11
- Tested with WordPress 6.2
1.0.10
- Update translation.
1.0.9
- Rename functions to avoid conflicts.
1.0.8
- Rename plugin.
1.0.7
- Initial Release