
설명
With a few simple clicks, you can post a customized, interactive Google Map in your
blog. Follow these simple steps to post your map:
- Go to the ZeeMaps server (http://www.zeemaps.com) and create your map
- Add markers, regions to your map
- Add one marker at-a-time, using Additions->Add Marker menu item, or use Additions->Upload CSV to add multiple markers from a CSV file or Google Spreadsheet
- After your map is done, note the map number for your map (the number on the map URL after the parameter group=)
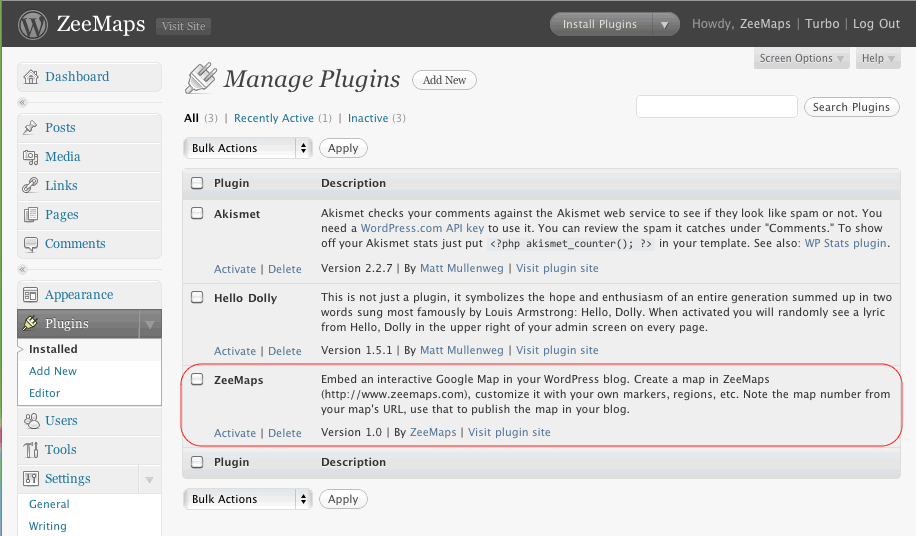
- Make sure you have the ZeeMaps plugin downloaded and activated
- Go to edit your blog entry
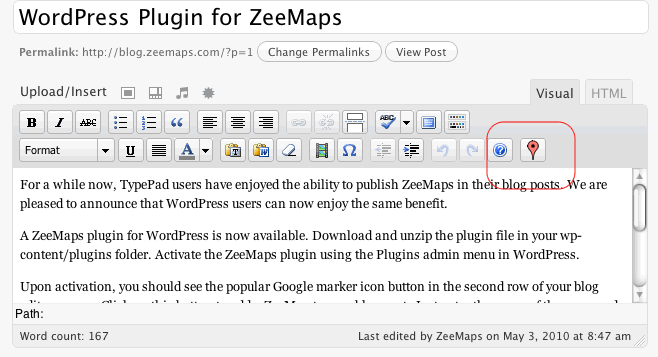
- In the second row for your blog editor menu buttons, you should see a new button with the Google marker icon
- Place your cursor in the location where you want to publish your map in the editor window
- Click on the Google marker icon button
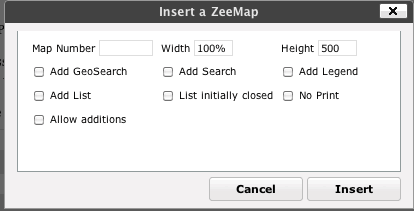
- Enter your map number and customize your published map in the resulting dialog
- Click on the insert button
This should add some text to your blog like:
[zeemaps 45 w=100% h=500 add geosearch]
This text will be replaced by the map in your blog.
스크린샷
설치
- Upload and unzip
zeemaps.zipin the/wp-content/plugins/directory - Activate the plugin through the ‘Plugins’ menu in WordPress
후기
이 플러그인에 대한 평가가 없습니다.
기여자 & 개발자

변경이력
Version 1.0.0
- Initial Release
Version 1.1
- Fix button layout
Version 1.2
- Added x, y, z parameters for centering a map at a given longitude, latitude, and zoom
Version 1.3
- Added option for SimpleAdd, TopBar